Dirt on the Strip: When Cucumbers Attack—A Southern Guide to Surviving the Harvest
July 27, 2026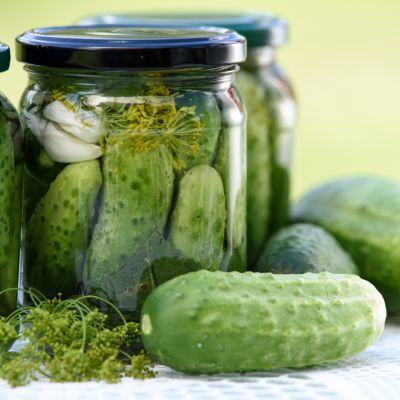
By Barbara LeForge, Golden Strip News Editor
If you walked out to your garden this morning and found yourself staring down a wall of green, take a deep breath. You aren’t alone.
It happens every year right around late July. One day you’re proudly admiring a couple of sweet little yellow blossoms, and the next, you’ve got cucumbers coming out of your ears. They’re hiding under leaves, hanging off the trellis, and popping up faster than weeds after an Upstate afternoon thunderstorm. You’ve given a bag to your neighbor, snuck three onto your mother-in-law’s porch, and your kids have officially threatened a full-scale mutiny if they see another green slice on their dinner plates.
Don’t panic—and definitely don’t let them turn into yellow bowling balls on the vine. It’s time to dust off the Mason jars, crank up the A/C, and turn that green tidal wave into gold.
Whether you’re a “boil-the-pot-and-seal-the-lid” traditionalist or a “too-hot-to-turn-on-the-stove” casual snacker, we’ve got two tried-and-true pickle paths to save your summer sanity.
The Cheat Code: Quick-and-Crunchy Fridge Pickles
For when your kitchen is already 95 degree F and the thought of a boiling water bath makes you want to move to Alaska.
No pressure, no canning gear, and zero chance of blowing up a lid. These are snappy, garlicky, and ready to snack on in just a couple of days.
What You’ll Need (Makes about 2 pint jars):
-
The Crunch: 1.5 to 2 lbs pickling cucumbers (cut into spears or thick coins)
-
The Brine: 1 cup water, 1 cup white distilled or apple cider vinegar (5% acidity), and 1.5 tbsp kosher or pickling salt
-
The Flavor: 4 cloves garlic (smashed), 4 fresh dill sprigs, 1 tsp mustard seed, and a pinch of red pepper flakes if you like a little Southern kick
How to Do It:
-
Pack your sliced cucumbers tightly into two clean glass pint jars along with your garlic, dill, and spices.
-
In a small measuring cup or saucepan, whisk the water, vinegar, and salt until the salt completely dissolves. (You can heat it slightly to dissolve faster, but room-temperature brine keeps them extra crunchy!)
-
Pour the liquid over the cucumbers, leaving about a half-inch of space at the top.
-
Slap a lid on, give it a gentle shake, and hide them in the back of the fridge for at least 24 to 48 hours before diving in. They’ll stay crisp and delicious for up to a month!
The Pantry Shelf Trophy: Traditional Boiling Water-Bath Dill Pickles
For when you want to look at your pantry shelf with pride in December and say, “I grew that.”
This is the classic, shelf-stable method. Just remember the golden rule of canning: always trim $1/16$th of an inch off the blossom end of your cucumber! That little blossom end contains enzymes that will make your pickles mushy, and nobody wants a sad, limp pickle.
What You’ll Need (Makes about 4-5 pint jars):
-
The Crop: 4 to 5 lbs firm 3-to-5-inch pickling cucumbers
-
The Brine: 3 cups water, 3 cups white distilled vinegar (5%), and 3 tbsp pickling salt
-
Jar Additions (per pint jar): 1 head of fresh dill (or 1 tsp dill seed), 1 clove garlic, and 1/2 tsp whole mustard seed
How to Do It:
-
Prep the Jars: Wash your pint jars, lids, and bands in warm, soapy water. Get your water bath canner filled and heating up.
-
Make the Brine: Combine the water, vinegar, and pickling salt in a saucepan and bring it to a rolling boil.
-
Pack ‘Em In: Drop a head of dill, a garlic clove, and mustard seeds into the bottom of each hot jar. Pack your trimmed cucumbers in as tightly as you can without crushing them.
-
Pour & Seal: Ladle the hot brine over the cucumbers, leaving $1/2$ inch of headspace at the top. Run a plastic utensil down the inside sides to pop any trapped air bubbles, wipe the jar rims squeaky clean with a damp cloth, and screw the bands on fingertip-tight.
-
The Bath: Lower the jars into boiling water (make sure the water covers the tops by at least an inch). Cover and process for 10 minutes.
-
The Reward: Carefully remove the jars onto a towel on your counter and wait for the sweetest sound in Southern gardening: that sharp, glorious PING! of a vacuum seal.
A Quick Tip from the Extension Office:
If you’re ever in doubt about canning times or safety ratios, stick strictly to tested recipes like those from the Clemson Extension HGIC. Safe pickling is delicious pickling!
About the Author
Barbara LeForge is a passionate storyteller, dedicated community leader, and active participant in the Mauldin community, where she serves as her neighborhood’s HOA board president. A former educator, Barbara now homeschools her four amazing children, balancing daily lessons with the vibrant chaos of a busy home. When she isn’t running community meetings or editing local news, you can find her tending to her backyard oasis as an experienced gardener or working on her next literary project as a published author. She loves sharing her practical tips, local insights, and a little Southern humor with her neighbors through her regular column space.